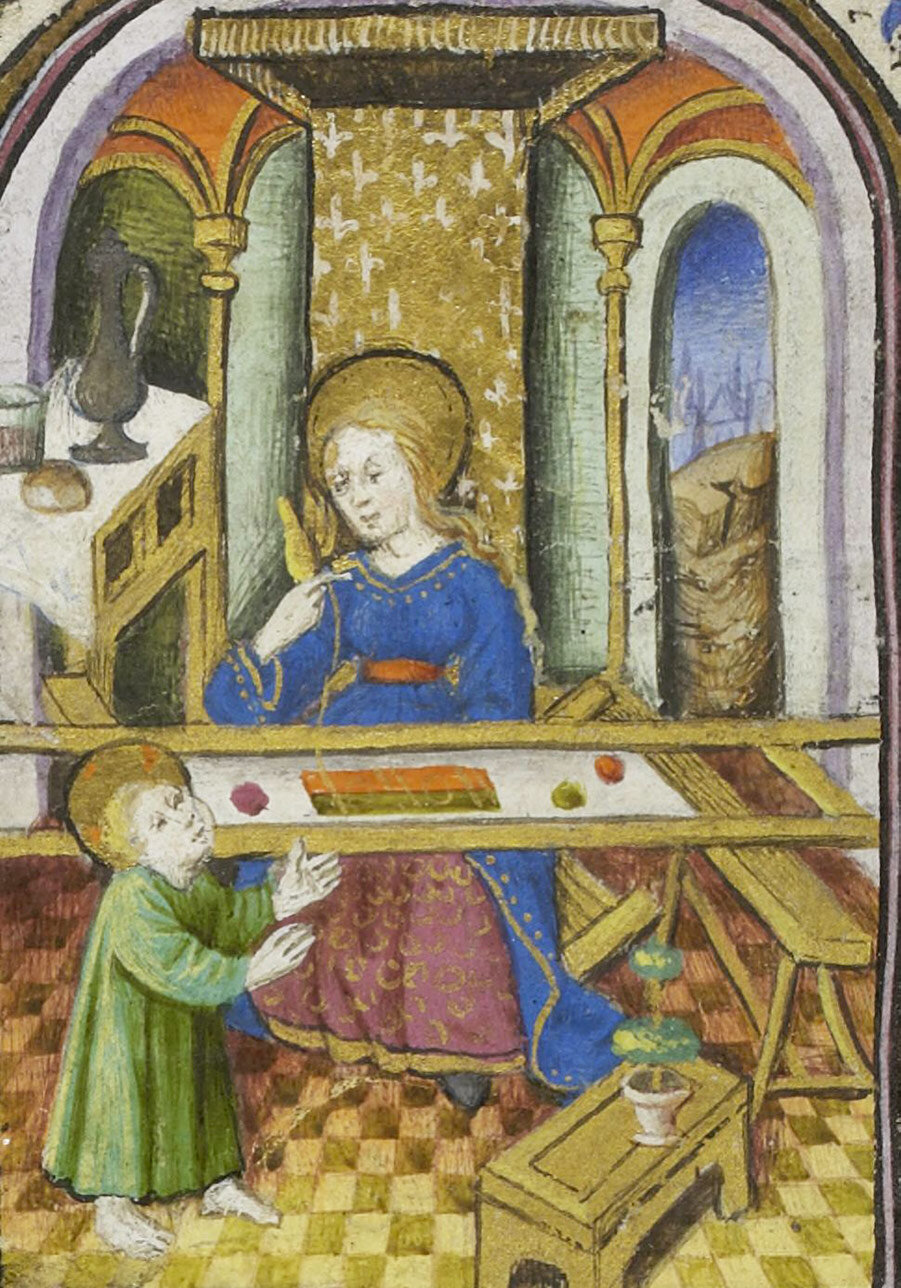
Getting Started - an artist’s update
An update from Diana Pops, on her liturgical art project
To read Diana’s earlier post explaining this project, click here.
Hello all,
I have begun to stitch (only just!), and I wanted to share the process of getting to the first stitch. Doing this the medieval way adds considerable time to the process, but for a history and art nerd (such as myself), it deeply enriches the process.
The first thing to do was to prepare my traditional slate frame for the silk cloth.
*deep breath*
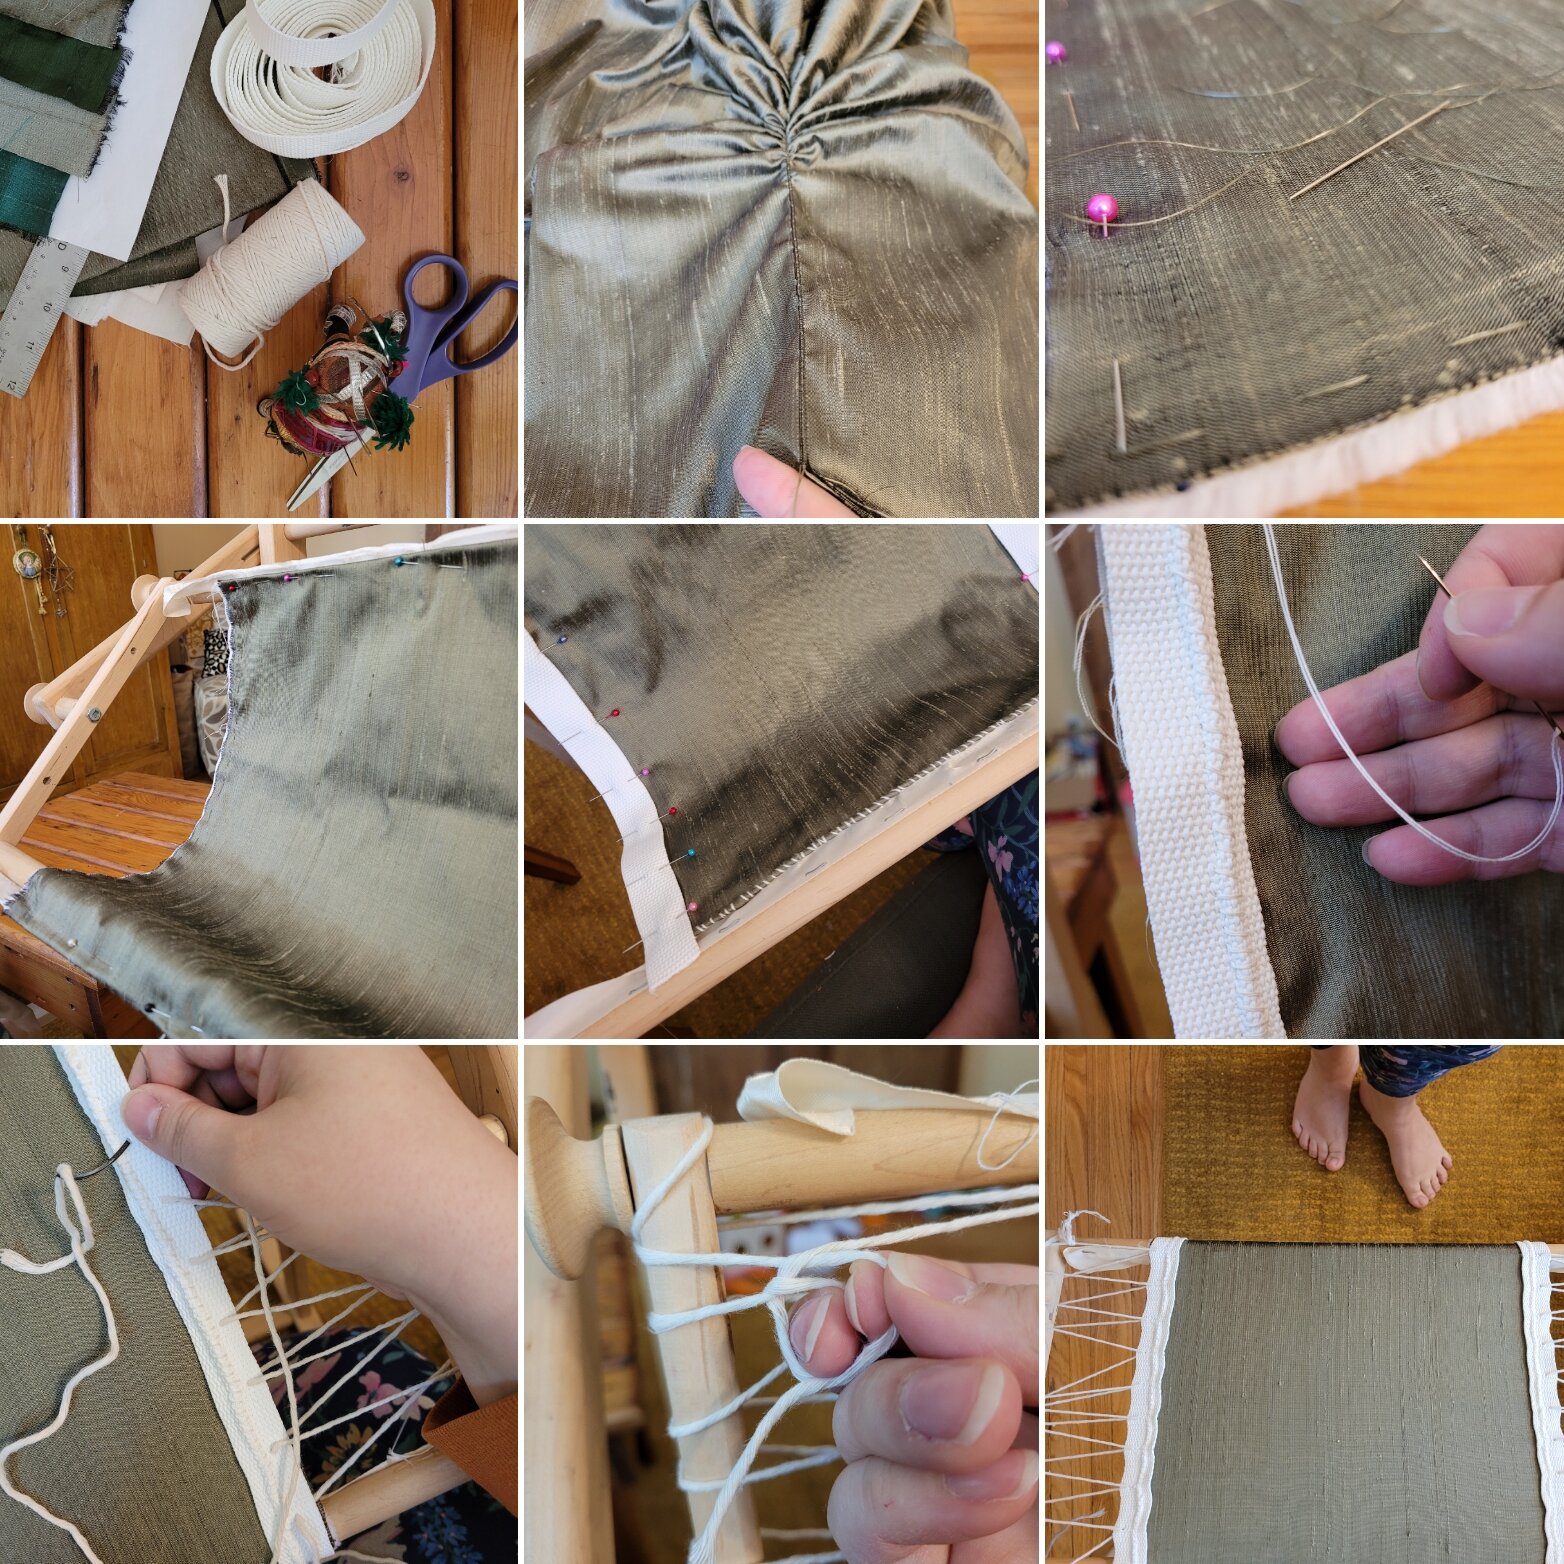
First, take your silk cloth and an unbleached cotton backing cloth, cut them to size and baste them together with long stitches. Then pin and tightly overstitch your combined cloth to the top and bottom of your slate frame. Now, tightly overstitch lengths of heavy cotton herringbone tape to the sides of your cloth. Take a bracing (curved and bladed) needle and heavy cotton string and stitch through the heavy tape on the sides and up and around your frame. Repeat up both sides at one inch intervals. At the tops of the sides of your cloth, tie slip knots in the strings around your frame. Tension your string on both sides, and tie slip knots at the bottom. Now tension the top and bottom of your frame using the roller bars. Now again loosen your slip knots and tighten the sides as before. And finally, tighten the top and bottom of your frame again.
Your cloth should be "drum tight". It should resound when you flick it with your finger.
This takes a few hours, but now your frame is prepared!
...and it's on to medieval style design transfer.
The first thing to do was to begin the process of making a medieval paint. To make a paint you need a binder (to carry your pigment in a liquid state) and pigment (the colour).

I opted for a paint called egg glair, or just, glair.
Egg glair is a tempura paint. "Tempura" comes from the Italian dipingere a tempera ("paint in distemper"), from the Late Latin distemperare ("mix thoroughly"). The tempura that we usually think of when speaking of paint is an egg yolk based paint. That kind of paint was used mostly for painting on board. This paint will be used to paint lines on silk, and egg tempura made with yolk is full of fat...which leaves oil marks...so, glair, made from the fat-free whites of eggs is a much better choice. Egg glair is a very ancient paint. The ancient Egyptians used it to paint coffins, and the medieval scholars used it to paint their illuminated manuscripts.
To make egg glair, carefully separate a few fresh farm eggs. The fresher the egg, the better the glair. Place the whites in a container with a spout, and put the yolks aside for baking or whatever you like to do with eggs. Whip your whites to soft peaks, then cover and let them stand overnight. In the morning there will be liquid underneath the whipped egg. That is your glair. Carefully pour it off into an airtight container.
Voila! Glair. This will act as our binder, which holds our pigment together.
Now, speaking of pigment, it was time to prepare our pigment.
For craftspeople, using egg shell as pigment was common in the middle ages. Perfect! I happened to have some from glair making. To prepare your eggshells, carefully remove all the membranes from the inside of the shells, gently wash the shells, and set them aside to dry.
Now, wait two days because you have a teething baby and she cries if you put her down.
OK. Back after a couple days, after all this preparation, it was finally time to transfer the pattern!
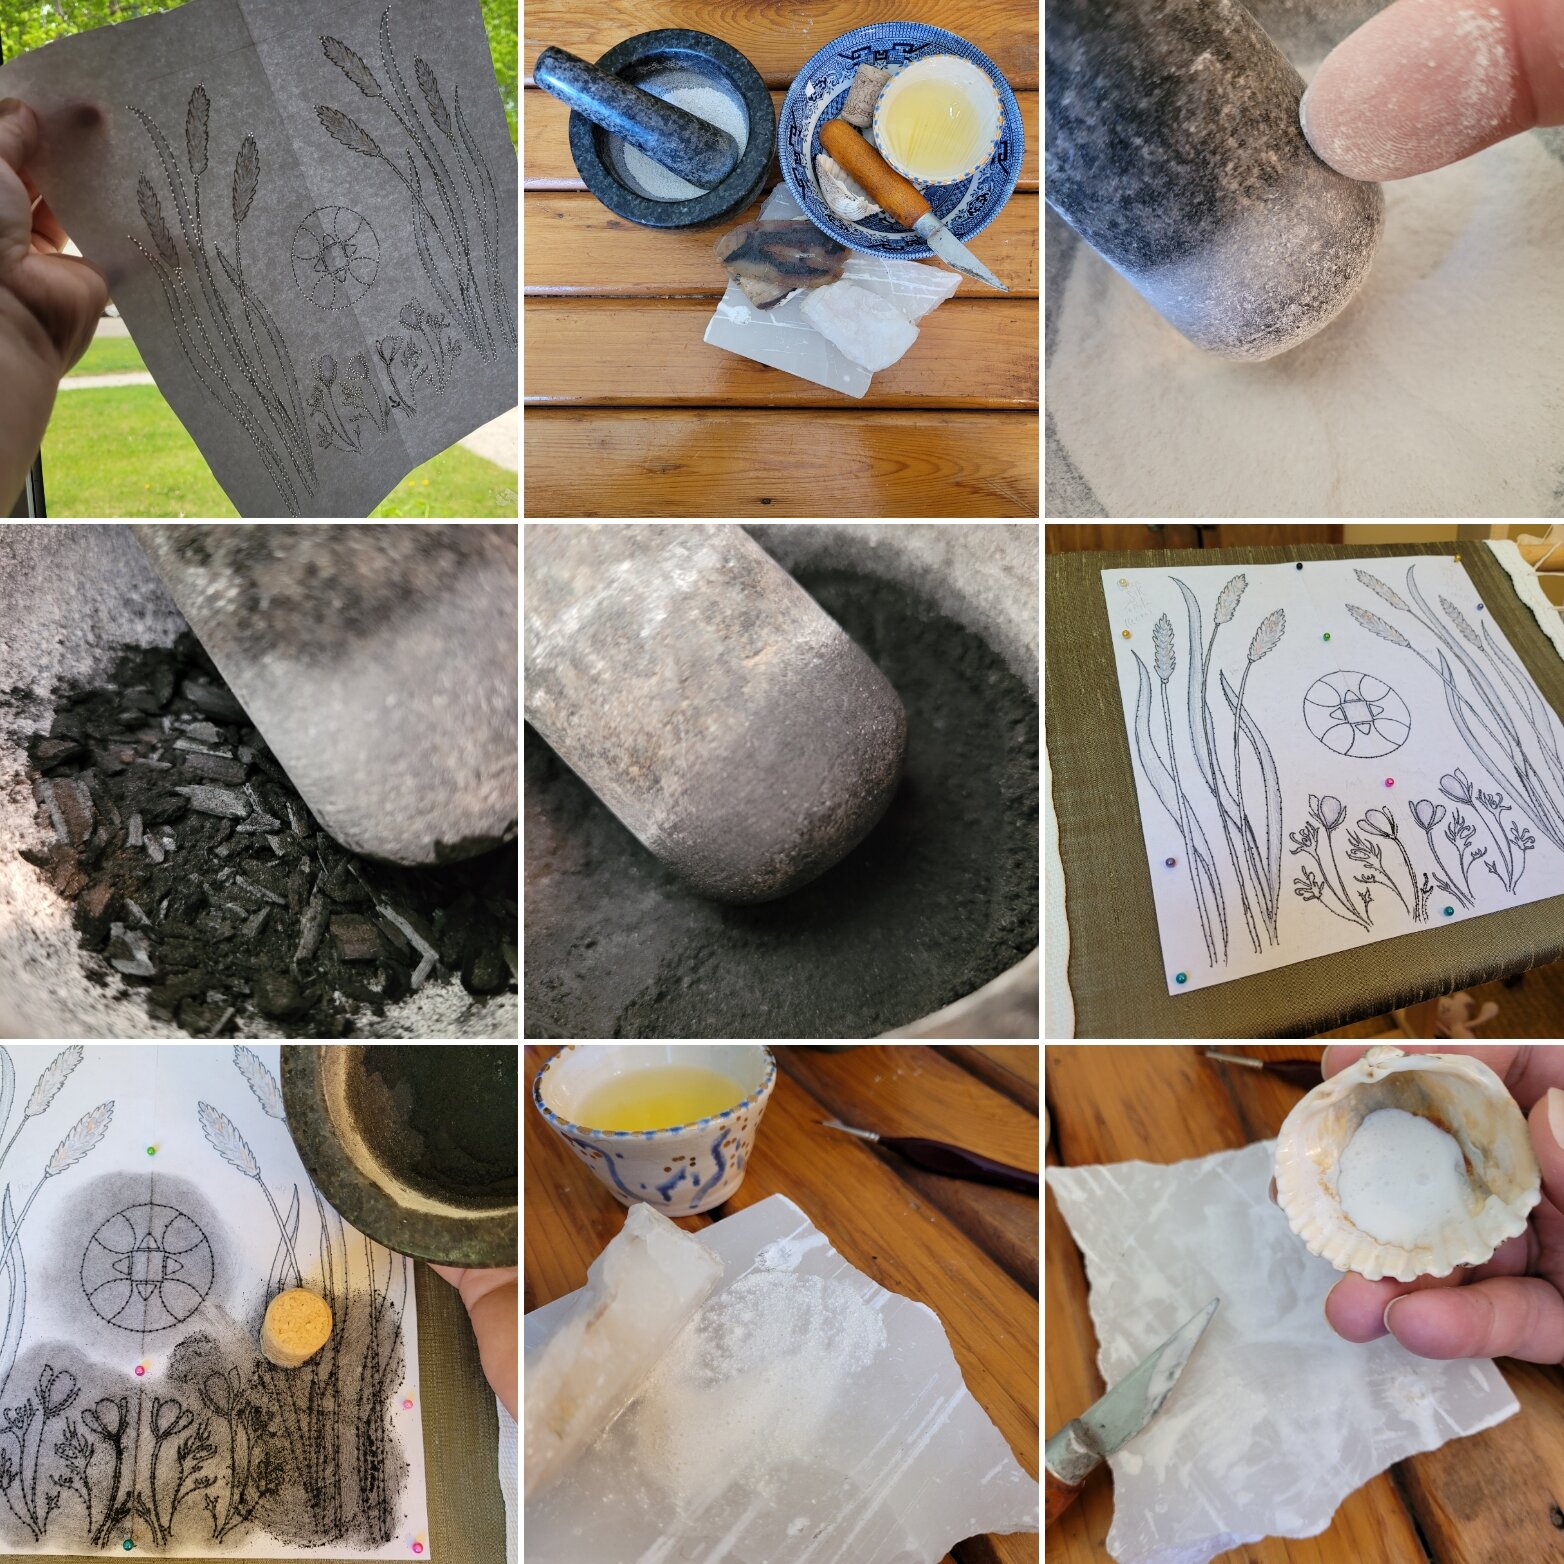
To begin, I poked hundreds of tiny holes along the lines of my design using a needle stuck in a cork. I then prepared my pigment by grinding the prepared eggshells in a mortar and pestle to as fine a powder as I could achieve. I then did the same with some willow charcoal.
My design with holes was then pinned to my silk, and taking my trusty cork again, I placed a piece of felt on the bottom of it. This was dipped in the charcoal dust and rubbed all over the pierced paper. When the paper was lifted, the design was left on the silk in charcoal.
I then mixed my eggshell egg glair paint. At this point time was of the essence as glair dries very quickly! I used two slabs of alabaster to mull my paint. I placed my eggshell pigment and some glair onto the bottom slab and then mulled the paint with the two rocks until it was fully mixed and had broken down the eggshell even further. Then it was transferred to a seashell. Medieval painters felt that a seashell imparted something to the paint, so almost all paints were kept in seashells. Having now done this process, that doesn't seem completely nonsensical. Grinding pigments between stones is laborious and very fine pigments were highly prized. One might assume then that some lesser value pigments were not so finely ground. Would the act of pulling a paint brush through the paint scrape the tiny granules of pigment against the nacre (shiny part) of the shell, perhaps bringing some minute bit of it with the pigment onto the brush? Doesn't seem so far fetched.

I'm rambling.
After all this, finally, I painted my design onto my silk. NOW, at last, I can begin to stitch.

If I'm honest, I wasn't that happy with how messy the paint went down onto the silk. I'm quite meticulous by nature and was so careful...but it still looked just a mess!
However, I told myself, "You've come this far...follow the research and keep on".
Fascinatingly, as I began laying my gold cord and stitching over it with my silk thread, the paint powdered away to nothing, leaving no trace, just the cord laying on the silk cloth...
...and I thought to myself, "You clever, clever, clever medieval embroiderers. You guys knew what's up."
SO. Now begins the real work. In my next blog I'll share some of the history of the stitches I am using and why they were important in the eras they are from. I am jumping all over early medieval to Renaissance stitches with the stitchwork. This is because early medieval English embroidery (known as Opus Anglicanum) used only two kinds of stitches. More on that next time.
Lastly, I've attached a quick selfie of me stitching while my daughter Vivian begs for French fries. I had just said, "No. If you're hungry you may have a fruit", so understandably she looks quite upset. Parenting, amiright?